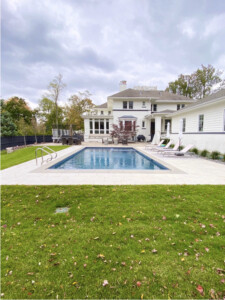
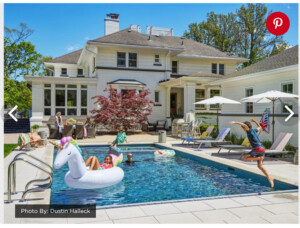
For the past 10-20 years my husband and I have always dreamed of building a pool for our kids to enjoy. We love going on vacation, but with our busy schedules, it just doesn’t happen as often as we would like. So, why not bring the vacation vibes home?
Easier said than done.
Initially, we had plans of building a home, and a pool was in the plans. When that fell through, and we bought an older home last September, we promised our kids a pool, and so here we are. Boy oh boy, I did not know how involved this idea was.
The first thing I did was ask around the neighborhood until I found the most reputable pool installer in the area. Since this project is an investment, we had to make sure it is done correctly. We did not want problems down the line! I CANNOT STRESS THIS ENOUGH. You have to look into hiring the most reputable company for a project of this magnitude. From day one, I could tell they knew exactly what they were doing.
We called this local company, Deep Downes, right away in February, and we did not get permit to start until June 9th. That is how long the process took for us. Our village is very picky and Covid-19 slowed things down even more.
Designing the actual layout of the pool was the easy part. We knew we wanted gunite because everybody in our area did gunite, and we just went with that. In fact, this company does not even do fiberglass pools, so that was an easy decision for us. Of course, we looked up the pros and cons, and in the end we decided gunite is the best choice for us. I knew I wanted the pool to extend to the length of the garage and be rectangular and geometric. The difficult part for me was choosing water tile and the pool color.
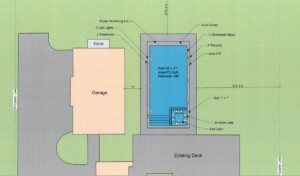
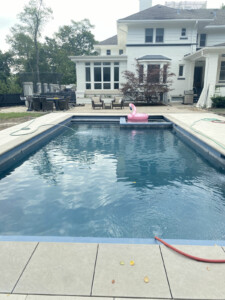
Here is the layout we decided on. Initially we wanted the pool on 7 ft away from the garage as to not take away grassy area on the south side of pool. However, once these plans went into the village, they came back saying we needed to push it out 10 ft more so that we don’t hit electrical lines. These are the things that come up that you really do not expect, and it totally ruined my vision for the area. There wasn’t anything we could do about it, so we decided to just keep moving on with the plan. We thought maybe we shrink it to 14 ft wide, but then we decided to just keep it the same size of 17ft wide by 36 ft long and we are so glad we did.
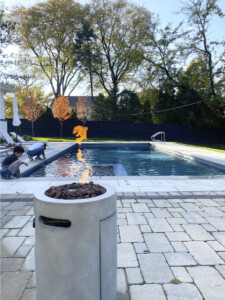
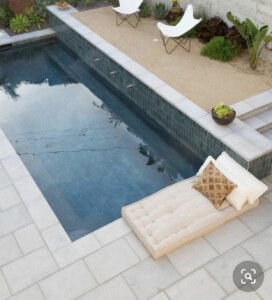
After looking at the budget once more, we decided to omit the spa. Then, when they were framing the pool, at the very last minute, we had a change of heart and re-added it. The spa is only 7ftx7ft, so there is still a lot of room to do laps. We caught them in the knick of time, and re-added the spa. I loved the idea of an integrated spa, so that we do not take anymore yard space. If we had a larger space, maybe I would do a separate spa. As you can see from this perspective, we still have over one half of the yard left, so we were relieved to see this.
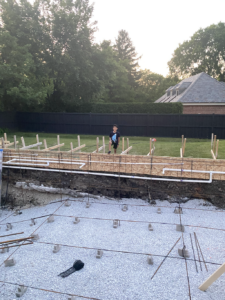
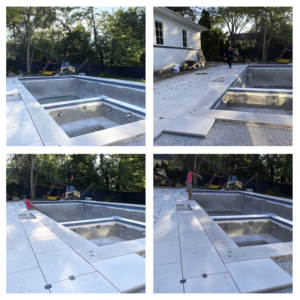
The process of building a pool seemed long, but everyday something was being done. These workers worked every day and even came in on some Saturdays. The next step was to frame the pool. After it was framed, I had a freak-out moment. It seemed so large. The installer kept reminding me that there is still so much more that would need to go down, so it will shrink in size.
The spa area was framed out and we were so happy to see this. After adding the spa, we were delighted that we kept the pool on the larger side so that if anyone wants to do laps, there is ample space. After they framed it, loads and loads of gravel were put down so that the steel can come in and they can pour the concrete.
The steel went in next and they were ready to shoot the gunite.
The concrete was shot into the “hole” and the pool was starting to take shape. Although, the mess surrounding the pool started giving me major anxiety. I thought we were almost done at this point, and I was completely wrong. They still had to trench for gas, add plumbing for the spa (since I added it late, they had to retrench that area), and so much more had to be done. At this point, we still had another month ahead of us.
Another thing we did not account for in the initial budget was the actual deck around the spa. This particular company does not install decks, but they referred me to somebody very reputable that was able to take care of all of the other items, like trenching for the gas, removing existing pavers and putting them back after trenching, and grading the yard. These are all things that we didn’t exactly account for, but they are just as important as the pool itself. The pool installer did warn us of these “extras” that people are usually surprised by when building a pool.
Decisions, Decisions
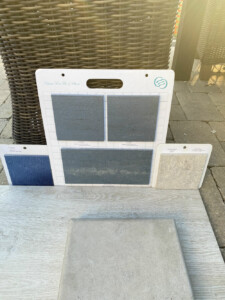
It was time for me to start making some decisions that I was putting off. They kept telling me to come into the showroom to choose a tile, and I finally made time to drive out there. At that meeting, I basically failed. I did not choose anything. I had all my pinterest boards, and inspiration pages ready, but I had a very difficult time choosing the waterline tile. I have never done this before. I did not want it to look like an outdated pool. I did not want huge shiny blue pavers with big white grout lines-that I did know.
I took home some samples and held them up against some of the deck choices I had in mind. After many polls on Instagram and thinking about what I really wanted, I finally decided on a waterline tile, and that was a huge relief. At first, I thought about having black slate tile, but I did not want the pool to be too dark because the surrounding tile has an effect on how the water will look, and I knew that slate tended to show watermarks more than other tiles. Here is the tile I decided on. I decided on a matte, blue-gray tile that has the slate look without the upkeep called “Glacier”.
Initially, I wanted to line the top of the spa with mosaic, but I decided against that after going back and forth and going back to my original inspiration photos.
I held up my waterline tile to the coping, Indiana Limestone, to make sure they gelled well and it looked good.
Hardscape
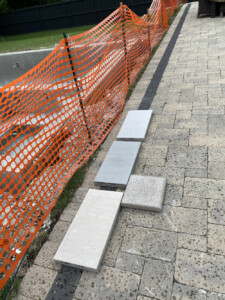
We did not realize that the hardscape to the pool is an added cost. I thought, oh, I’ll just have the coping and throw some pavers around the pool with grass in-between and call it a day. Then, we found out that our village requires 4 ft around the perimeter of the pool. And since we had a void between the garage and pool, I thought this is the perfect place to have lounge chairs and a larger area by the pool for the kids to jump into the pool from. Initially, I had chosen a porcelain tile for the deck, but when we found out that you have to add concrete under that and it’s an extra cost, we decided against that I started scouring the Unilock catalog for the most perfect stone! I found my solution for the deck. It is called “Arcana” from Unilock and it is a substantial block made mostly out of concrete and aggregates. It’s non-slip surface made it great for pool surrounds. Below is a picture of the Arcana stones and the colors they come in. I opted for the Laguno color in an 18×24.
As the waterline tile went down, I started to rethink my decision about laying a beige stone on top of the spa. There was a certain look I was after, which was having the tile on top of the spa matching the coping. Unfortunately, the designer did not explain to me that the waterline tile will also line the spa and having 2 different tiles budding up to each other really bothered me. It did not look seamless, so I made them change it to the same blue waterline tile after laying it down myself and looking at it. This was not an easy change. They had to wait 2 weeks for it to come in, but thankfully, it did not delay anything. The tilers had to come back and install it once the custom tiles came in.
The pool decking came in, and we started laying them down to try to envision how it would look.
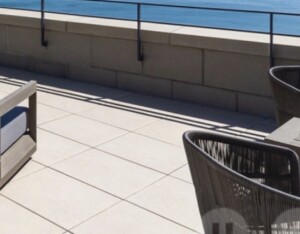
Some of my original inspiration photos:
I loved the water color on this one and I loved the spa. The decking was exactly what I wanted as well.
This was another inspiration photo. I loved the clean deck once again, and the color of the water.
The deck was really starting to take shape and it was starting to finally look like a pool area. My inspiration photo was coming to life and I quickly realized the importance of the hardscape. Another think to note is that the hardscape should really be done before the plaster and before the water is filled, or all the debris will dirty up the pool.
The next decision was the hardest…the plaster color.
I stressed over this so much and my followers on Instagram and my family can attest to this. There is a jewel-toned color I was after and I could not find pictures of it online. I knew it was not one of the tried and true light blues that are so often found in hotels. I did not want a neon blue either. I looked at over 1000 pictures on Pinterest, and I was not finding what I wanted. My installer gave us some Hydrazzo samples to sleep on so my ruminating began.
I searched and searched. My installer insisted that I should look at French gray. “A gray pool?” I wondered. I knew I’ve always loved a lighter pool. But when I started noticing the gray pools trending, I thought people might be onto something. It is not the look of the 80s and 90s. It is very different. When it is cloudy it looks almost like a mirror, and when it is sunny, it takes on a jewel-tone like no other. I still was not convinced after seeing numerous celebrities and lots of pools in Palm Springs with gray bases.
So, I quickly reached the deadline for choosing a color and the owner of the pool company called me in the morning. He told me “listen, we need to go out and see some pools today, but you will have to drive 45 minutes out.” I told him, “Absolutely!” I knew I needed to see some pools in real life, and so we went.
He took me to three beautiful pools. The first was gulfstream blue. I liked it, but I did not love it. The next was French gray. It was an extremely cloudy day. I liked it, but I was nervous that it was too dark. The next was Catalina blue. The pool was almost a blinding blue. It was a very obnoxious color to me, and I did not like it at all. It took a few days, and I finally made my decision. This is the color that my husband wanted all along, by the way. I emailed the owner and told him that we were going with French Gray!
As soon as they knew the plaster color, the plaster was scheduled within 2 days. They wanted to finish this 2 month project, just as much as we did.
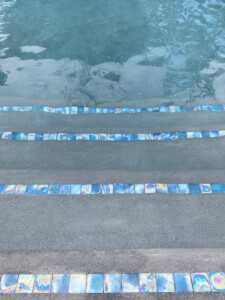
As if I needed one more decision, at the last minute they threw me a loophole and asked me if I wanted tiles lining the stairs and the spa. I thought this looked a bit traditional, but it really does serve as a safety measure. I cannot tell you how many times I walked into a pool and missed my step. I thought, here is my chance to add the pretty mosaic that I always wanted. I quickly texted one of my decor besties, who has a pool and who has helped me along this journey and she said, “Do it”! I figured it would be under the water the whole time anyway, so why not. I am glad we added them. They really add a nice touch.
After they laid those safety tiles, the next day was the long awaited plaster day. I was so nervous. I could see the dark plaster being shot into the pool and I was in panic mode. The hubs kept assuring me that everything will be okay!
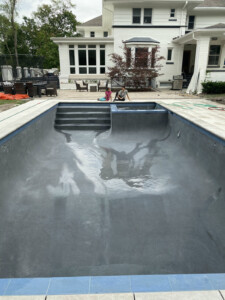
The plaster was complete and a huge sigh of relief for me. I was just happy that the process was over and we could start filling the pool! They came to polish the pool the next day and before they left, they helped us get 3 hoses running! It filled in less than 24 hours!
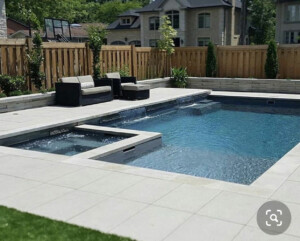
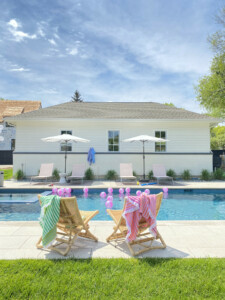
The next day we woke up to an almost filled pool and it was extremely cloudy! The crazy thing about French Gray Hydrazzo plaster is that it is such a chameleon. In the clouds it looks like a mirror and once the sun comes out, it is a jewel-toned blue. It is so beautiful! Take a look for yourself!
Do your homework before you build a pool! It is not an easy task. Make sure you find a reputable company. And, most importantly, be patient! It is a long process. Now, let’s start making memories!
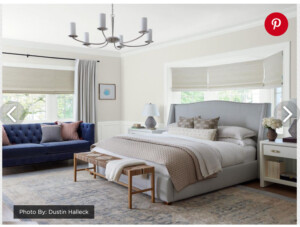
Alas, the time has come to finally reveal my One Room Challenge space. Better Homes and Gardens has sponsored this One Room Challenge this year and I have had an absolute blast as one of the 20 feature designers. It was truly an honor to be chosen and I feel like this was a true turning point for me. I have taken a room that I thought was hopeless to a space that my kids do not want to ever leave everyday and that is the best gift possible. I would like to first start by thanking all of my sponsors. Here is the list of my sponsors below. First, if you missed any of the 7 blog posts for every week of the One Room Challenge, here is a recap… Week 1 and Week 2, Week 3 , Week 4, Week 5, and Week 6, Week 7 . Also, I wanted to do this particular space because it was the worst spot in our house and hopefully that can inspire everyone to tackle their least liked space in their home.
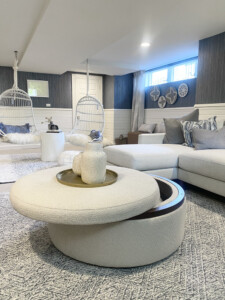
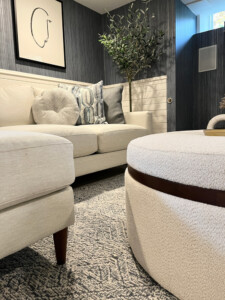
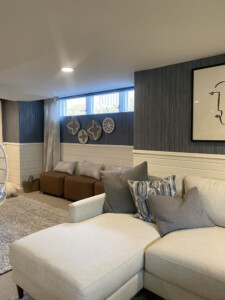
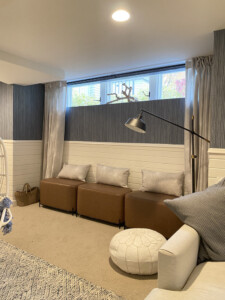
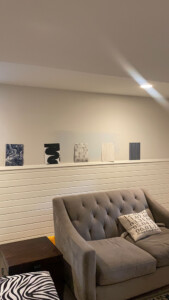
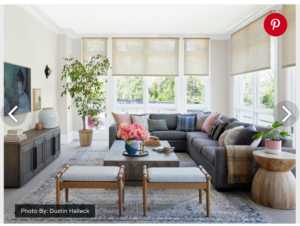
Since I have covered all the above brands in previous posts, I would like to focus this reveal post on the furniture from Jonathan Louis. All my other sources are covered in weeks 1-7. I have been hiding this sofa and ottoman for more than two weeks now and I cannot wait to reveal it. It is the focal point of this entire makeover and it is just gorgeous.
Jonathan Louis is a family-owned and operated furniture manufacturer based out of California. They are one of the largest furniture manufacturers in the United States. They are a group of passionate artists, designers, creators, and builders. They have countless configurations, colors, styles, and fabrics to help bring out each person’s individual style.
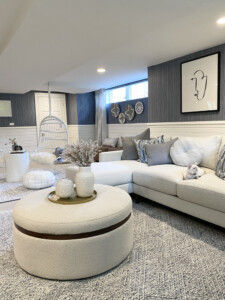
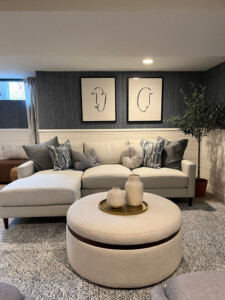
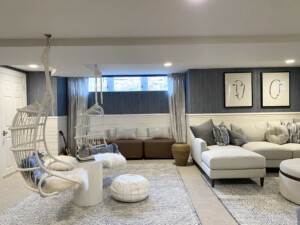
The brand has a fully customizable collection called Jonathan Louis Design Lab, which was perfect for my project since I could tailor every choice based on my individual style. I designed a loft sofa with a left-facing chaise in Thrillist Pearl fabric, track arms, Gel Plush seating, and walnut cone legs. I layered on a set of custom pillows – their Maximalist Plus package – in Jubilee Steel, Pewter Plaything, Chunky Monkey Pewter, and Groundwork Indigo fabrics.
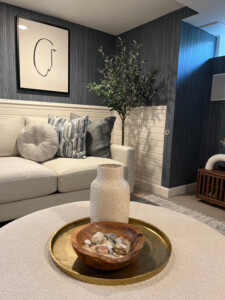
The icing on the cake is the Bell Storage Ottoman in Jubilee Pearl that has a swivel top opening. This is such a great solution for storage. Needless to say, this sofa,ottoman and pillows from Jonathan Louis Design Lab turned out fabulous!!!!n
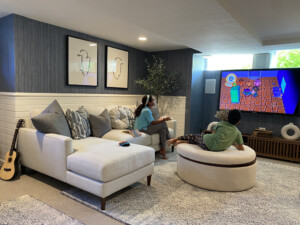
I talked about Jonathan Louis Design Lab extensively in Week 7. This collection truly takes the guesswork out of ordering and choosing your dream sofa. I love that you can customize the size, layout, arms, depth, legs, and comfort with an in-store app! And the fabric selection that Jonathan Louis offers is second to none. I chose Thrillist Pearl because of its durability since this will be in the basement. It is stain-resistant and that gives me peace of mind. In addition, their “Sofa Pop” program allows you to complete your entire look with accent pillows, ottomans, and chairs customized in your choice of fabric. My pillows and ottoman were part of Sofa Pop and definitely complete my space.
I couldn’t be more excited and pleased about this sofa. The comfort level is so inviting as well. My kids and their friends have been lounging on this sofa since we got it and it has given my husband and I a comfy spot to watch our kids play the latest level of Super Smash Bros. n
Here is a link where you can learn more about Jonathan Louis Design Lab and find retailers near you.
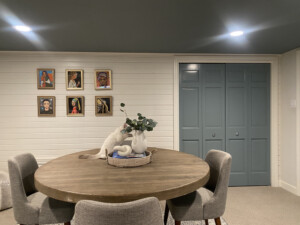
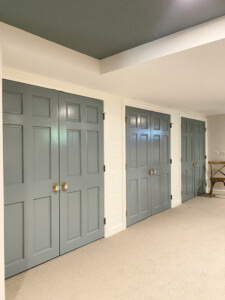
In this area, I also painted the ceiling using Kelly-Moore paint in the color Harrow’s gate to match the 6 closet doors and the board game closet.
Closet Doors
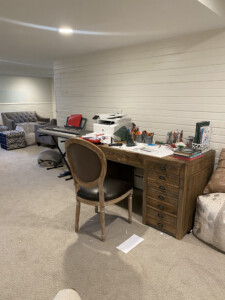
Desk/Crafting space
Let’s move on to the desk area. My kids use this to do their homework, draw, and do crafts. I knew these cups of markers and colored pencils were no longer going doing the job. They fall over and they look extremely messy. At first I wanted a floating shelf to put these cups on, but then I thought of s super simple, inexpensive solution.
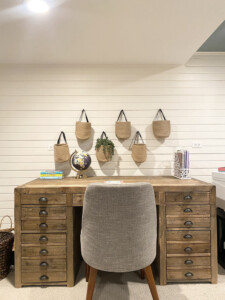
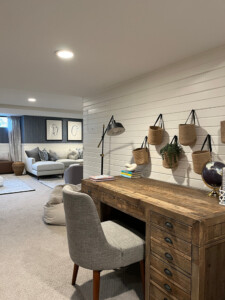
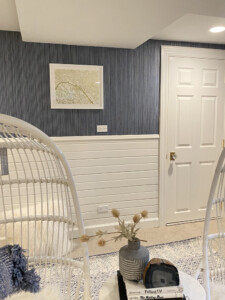
These cute hanging baskets now hold pens, markers, colored pencils, and they are out of sight out of mind. This is such an easy and effective solution. This shiplap was begging for something like this!
And that is a wrap! I am so blessed and grateful to have had this opportunity and I would like to thank the One Room Challenge and Better Homes and Gardens for choosing me to be one of the 20 feature designers! And, of course, I have to thank my sponsors one more time. They are all mentioned above, but this post has been dedicated to Jonathan Louis Furniture. I have learned so much from this process. But, the best lesson I learned is to never give up on any space. Every space has potential and it is up to you to discover the greatest potential of every space in your home!
I have made so much progress in my One Room Challenge this week. If you missed Week 1 and Week 2, Week 3 , Week 4, Week 5, and Week 6, please make sure to take a look. Next week is the final reveal for the One Room Challenge and I can hardly wait. So many sleepless nights thinking about my design dilemmas for this space…. the perfect wallpaper for this space, the right tone of blue paint, a black or white sofa, plain ottoman or printed ottoman, what type of rug, should I add light fixtures, is this room good enough to share? Ahhh, I am finally done and I am so proud of my achievement!
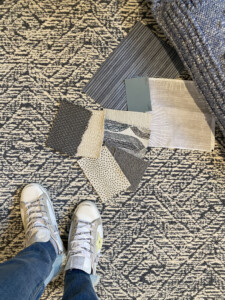
One of the final pieces of my One Room Challenge, is the gorgeous sofa and ottoman gifted to me from Jonathan Louis. First off, I’d like to show you how I brought all the swatches together to create a cohesive design plan. I had an absolute blast choosing my fabrics when customizing my pieces from Jonathan Louis Design Lab. But, I also added some drapes with the help of Spoonflower.
Jonathan Louis Design Lab
When I heard about Jonathan Louis Design Lab, I wondered where this had been all my life. It is a designer’s/homeowner’s dream. It has made designing a sofa/sectional an absolute breeze. You can customize your sofa with the following options (images taken from the Jonathan Louis Design Lab website) using an in-store app, and then place your order directly at the store. There are retailers all over the U.S. that carry Jonathan Louis Design Lab.
This is absolutely brilliant considering how difficult it is to choose furniture. They take the guesswork out of the equation for you.
Once you have selected your sofa style, you are ready to order swatches and add some “Sofa Pop”. This means you can customize your space even more by adding fun throw pillows, chairs, or ottomans to complete your entire look!
Here are the fabrics I chose for my sofa, throw pillows, and ottoman. As you can see, I used my wallpaper as inspiration for the rest of the design. The smaller fabric swatches are all from Jonathan Louis. These will be used for the sofa, ottoman, and throw pillows. It didn’t take me that long to land on this design. I looked on their website and tried to stick to tones in my wallpaper. I am very excited about this design because it ties in so well with the rug, wallpaper, and paint.
I think it makes the most sense to reveal the Jonathan Louis sofa and ottoman during the final reveal, which is next week. So, you will have to wait just one more week!
Spoonflower
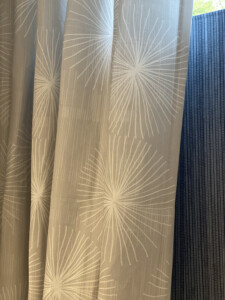
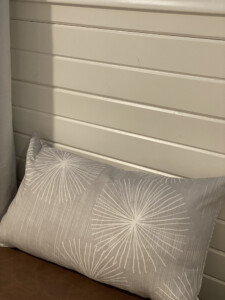
I also finished off the basement space with the help of Spoonflower. Spoonflower is a great brand that is “revolutionizing the textile industry with their on-demand digital printing technology and eco-friendly sustainable and scalable manufacturing processes.” I love that you can order wallpaper, throw pillows, tablecloths, drapes, and other textiles in the same fabric. I chose some gorgeous drapes and throw pillows from Spoonflower using the light grey dandelion fabric by Fritzin.
Dandelion really caught my eye because I was looking for something with the slightest pattern as to not clash with the wallpaper, but I didn’t want a plain fabric. The subtle dandelion pattern is perfectly whimsical and playful. Not too young, and not too serious and it has just a touch of a coastal pop. It is just perfect!
I love that you can see the pattern on this fabric up close, but when you pull away, the pattern almost disappears and this is perfect because I did not want it to compete with the wallpaper. It adds just enough interest to the eye.
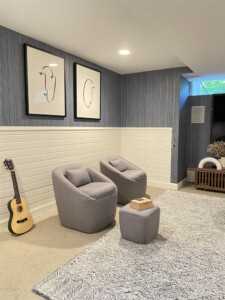
The Spoonflower drapes and three throw pillows completed this reading nook and made it a cozy place to hang. I just love it. The drapes perfectly frame the windows. The quality of construction on the drapes and the stitching on the pillows are truly outstanding.
Make sure to check out Spoonflower for an abundance of printed fabrics, textiles, and wallpaper. You can even order your wallpaper and textiles in the same print which would be super fun for any space.
Alas, next week is the final reveal! The completed space will be shared! From the painted ceiling and doors, to the rug selection, to the gorgeous new sofa. I am besides myself and almost in tears as to how I got this far.
See you next week for the final reveal. Please head on over to these other talented designer’s blogs to see what they are up to for week 7 of the One Room Challenge.
I am just about finished with the One Room Challenge. The rest of the furniture was delivered Friday morning. If you missed Week 1 and Week 2, Week 3 ,Week 4, Week 5, and make sure to take a look.
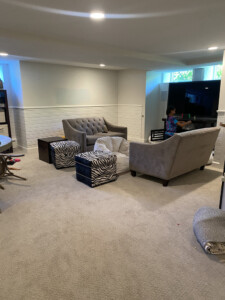
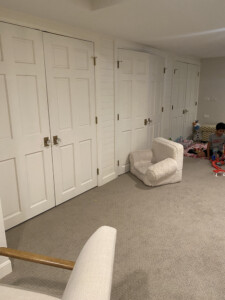
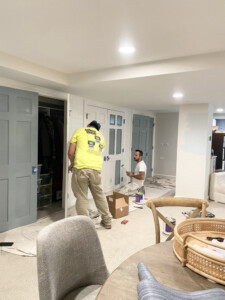
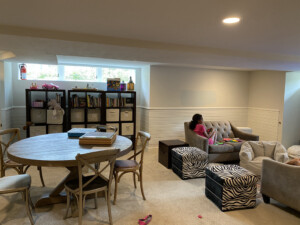
When I agreed to join the One Room Challenge as a feature designer I started to regret my decision very quickly. The basement playroom lounge used to be a very dingy, uninviting, mismatched space and I seriously did not think I can turn this space around. It has lower ceilings than the rest of the house and it just didn’t seem like it was possible to get this space looking better. It was “cringy” as my kids would say. But, with some tips and tricks that I have learned over the years, I was able to transform this space into a room my kids are now proud to bring their friends over to hang out in. Take a look at this before shot…I know, embarrassing!
Wow, I just look at this and laugh now! Well, if I were to give somebody a list of tips and tricks on turning a space such as this into an amazing hangout space, I would break them down into a few categories.
Start with an item of interest
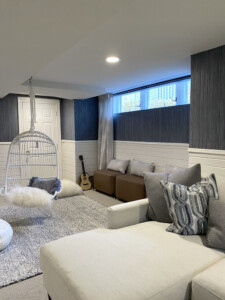
I started the design for this space with the wallpaper from Tempaper. You can read all about my wallpaper in Week 2. I pulled the rug, the paint, the sofa color, the throw pillow colors, the chairs all from colors in the wallpaper. I made sure that each of these items would complement the wallpaper well, not match. We don’t want them to match, they would clash if we did that. We want them to flow cohesively. Take a look below.
All of these fabric swatches complement the wallpaper, the rug below, and even the pillow color in the far right corner. Together they all blend and make the other items flow. I was able to envision all this by making a moodboard.
Vertical lines
I chose a wallpaper with vertical lines to help the space feel taller. Our basement playroom lounge has original shiplap detail on the walls. It is absolutely beautiful, but because it was laid horizontally, it doesn’t do much to the height of the space. Therefore, I chose a wallpaper with vertical lines to bring the eyes up and make the space feel taller. In addition, I did something, I have never done before, I painted the ceiling.
Go outside your comfort zone
Painting the ceiling in just one space made it feel more intimate and it tricks the eyes to making the space feel taller. I normally would never have done this. I would be too afraid because this is something way outside of my comfort zone. But, because I am supposed to challenge myself for this One Room Challenge, I decided to risk it and it was totally worth it. The risk really paid off!
Use paint to add interest
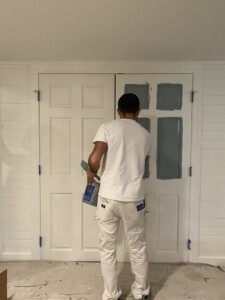
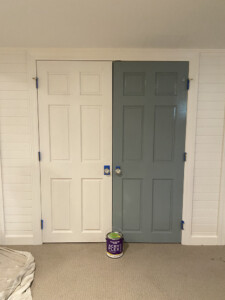
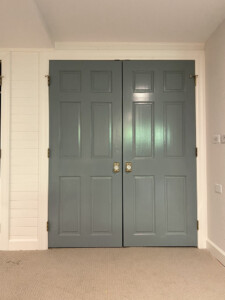
I knew I wanted to paint, but it was just a matter of where and what to paint. The doors have always seemed very blah to me, so I knew that paint was the perfect solution. I painted the 6 closet doors to add interest to that side of the space, but also on the bifold doors that store board games and other fun activities.
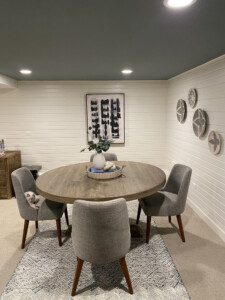
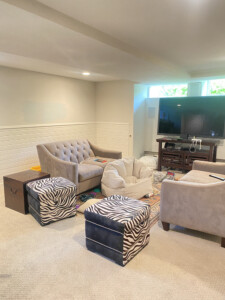
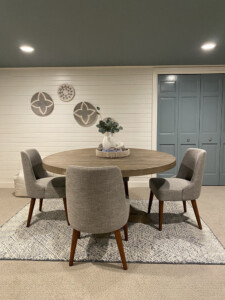
I am sure by now, you have noticed these awesome chairs from Home Pop. Home Pop is another small furniture brand that I discovered recently. I chose 5 modern dining chairs in gray woven fabric. They are extremely comfortable and assembly took less than 5 minutes per chair. Since we play board games here, these chairs were the perfect addition to this space. I love the modern, clean lines, and how sleek they look! They are just perfect.
This was a quick update on my One Room Challenge. Most of my items are linked on my LiktoKnowit Page https://www.shopltk.com/explore/reems_design .
Make sure to come back next week when I will be revealing the sofa from Jonathan Louis. But, please head on over to these other talented designers blogs to see what they are up to for week 6 of the One Room Challenge.
I am actually almost completely finished with the One Room Challenge , but you will have to wait a bit longer for the final reveal. I am waiting on a very exciting furniture delivery at the end of this week. If you missed Week 1 and Week 2, Week 3 ,Week 4, and make sure to take a look. Last week I introduced you to the gorgeous rug I am using from Loloi and this week, I’d like to talk to you about one of my favorite art brands, Minted and a furniture brand I have discovered, Wovenbyrd.
Once again, my moodboard…and keep scrolling to see my moodboard come to life!
Wovenbyrd
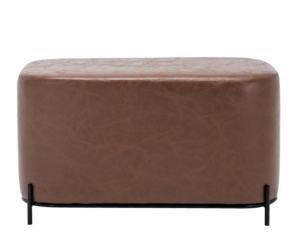
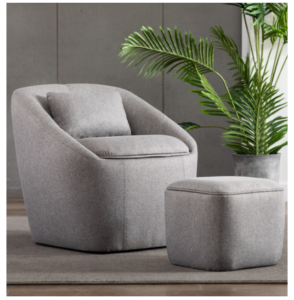
I discovered Wovenbyrd recently while browsing Target’s website for furniture. I was looking for clean, modern, high-quality pieces for my One Room Challenge. I chose the 32″ modern decorative bench with metal base in faux leather to create a window bench area. I also ordered 2 barrel chairs with storage seat and ottoman in gray linen.
Minted
Minted is my go to for holiday cards, photo books, but also art. Minted has “unique designs, freshly sourced from a community of independent artists. The most luxurious paper and printing techniques are used.”I love how they encourage independent artists. This is a huge factor for me when shopping at Minted.
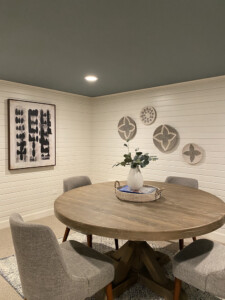
Here are the Minted pieces I chose for my ORC…
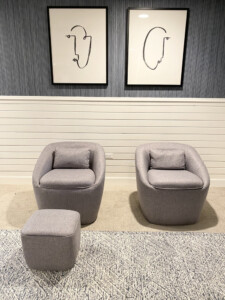
Face Study
I just fell in love with how whimsical these two pieces are. There are 2 different versions of Face Study and I love them together. Chelsea Petaja is the artist behind Face Study. Simple, clean, modern, fun, and neutral is exactly what I was looking for!
Domino Effect
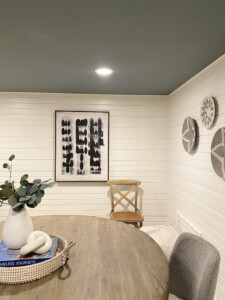
This limited edition piece really spoke to me because I was looking for a more modern piece. According to Minted, the textures in this experimental, acrylic painting are added upon each other, which creates, the domino effect; one would not exist without the other. Each layer helps build the story to pull the viewer closer. Fine lines of graphite peek-through the paint, giving hints to the works beginning.
I chose a walnut frame for this piece and I had it printed on canvas which really makes this piece stand out! The walnut frame is the perfect icing on the cake.
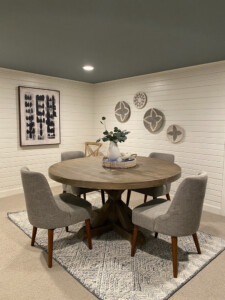
Here is the gorgeous “Domino Effect” and yes, that is correct, I painted the ceiling. In week 3, I talked about paint and here this is one more area I painted. I think along with the art, it really made this space more intimate and inviting. It also gave this gorgeous original shiplap a fresher look.
Gold Foil Maps
According to Minted, Celebrate a favorite place with a custom map print. Simply provide the address, we’ll automatically show you a map to preview, select your area, and we’ll create a custom art print for you. You’ll receive a proof to approve. Available foil-pressed, letterpressed, or in standard printing in a variety of vibrant colors.
One of our favorite places on Earth that we took two of our children to is Paris! We would use the Paris map daily to find our way around and this is an excellent reminder of that trip. Making art more personal is a great way to showcase your favorite places and things. That is why I chose this ,gold foil map of Paris.
Make sure to come back next week where I will be talking about the furniture selection for the space. But, please head on over to these other talented designers blogs to see what they are up to for week 3 of the One Room Challenge.
I have made so much progress in my One Room Challenge this week. If you missed Week 1 and Week 2, and Week 3 make sure to take a look. Last week I introduced you to the amazing paint color I landed on from Kelly-Moore Paints, “harrow’s gate” and I introduced my awesome media cabinet to you. Once again, the brands that I’ll be working with and my moodboard are below. n
Since the wallpaper from Tempaper turned out so stinkin’ awesome, I decided to pull out some of those gorgeous gem-tones that are so prevalent in the chambray peel n’ stick wallpaper for the paint, rug, the sofa, the pillows, etc. One of these areas that I think will really benefit from these blues is the floor! You might be thinking, please don’t add a bright, blue rug to your otherwise neutral space. Do not worry, I found the most perfect rug from my favorite rug brand whom I have partnered with before, Loloi rugs! nnA family owned company, Loloi rugs, has a vast array of everything from affordable reprinted rugs to higher end luxurious wool rugs and vintage pieces. “For the past 25 years Loloi, Amir Loloi, the owner has traveled the Indian Countryside searching for the best craftspeople and weavers. In 2004, he formed Loloi rugs so that he can bring those artisans’ work to the United States”. -Loloi website nn“In India our rugs are still crafted the old world way. Every step of the process-whether it be the dipdyeing of the wool or the intricate task of weaving is done by hand, where proud artisans keep this time-honored tradition alive”. What’s more, Loloi partners with Goodweave and this is so important to me. This ensures that no child labor is used in the process of making these well crafted rugs.
I think it is super important to buy your rugs from a company that has a conscience. And what is better than supporting a family-owned business? Loloi is my rug store of choice for all my rug needs. Now, let’s take a look at the rug that I think will really lay a beautiful foundation for the rest of the space…
Introducing the Kopa Collection Blue rug by ED for Loloi rugs. This rug is 100% wool and is made by skilled artisans. It is a low pile wool pile rug that will last for a very long time. What I love about this particular rug from the Ellen Degeneres collection for Loloi is that it gives me that hint of blue without being overwhelmingly striking in your face. As you walk away from the rug, the blue starts to diminish creating this very distressed look which I absolutely love! Not only that, it is the most calming shade of blue.
My original inspiration for this space was a coastal Hamptons beach inspired space.
When we vacationed in New York this past August, we spent 3 days in the Hamptons. I visited a ton of small boutiques and home stores. A lot of the boutiques had this exact shiplap on the wall and so I really wanted this space to vibe in that direction, but with a modern edge and I think the wallpaper provides that. The rug gives me that calming blue that I loved in the waters of the the East Coast. The rug tones are almost like a mix of water and sand!
I will be adding three of these rugs to the space to break up the space and give each space purpose. I wanted all the rugs to be matching so the space feels more cohesive and clean!
Stay tuned to the final reveal when I show you more angles and much more the space. Right now, I don’t want to give away too much. I hope you are enjoying my One Room Challenge progress.
Make sure to come back next week where I will be talking about my Art choices for the space. But, please head on over to these other talented designers blogs to see what they are up to for week 3 of the One Room Challenge.
One Room Challenge- Week 3, Painting and a Media stand!
So much progress has taken place in week 3 of my One Room Challenge. If you missed Week 1 and Week 2, you really should catch up because last week I revealed my wallpaper selection which has really helped guide the rest of my selections. This week, I want to discuss my paint selection and our media area for the kids video gaming.
I had put a phone call in to my painter so that I can get on his schedule because I knew that finding contractors right now is not the easiest. So, when he called me last week and told me he can come on Saturday, I jumped for joy. I thought of painting on my own for a hot second and then I came to my senses. Yes, I can do it, but I really wanted a neat job and when I painted rooms before, I really would make a mess and spill paint on the carpet, etc. Ha! So, Lucio came to my rescue on Saturday.
First off, I wanted to say that choosing a paint color is a daunting process. This is especially true when you are pressed for time. One of the sponsors of the One Room Challenge is Kelly-Moore Paints, they have been around since 1946. They offer an array of low VOC paint colors. Kelly-Moore Paints sent me the paint sample box and booklet right away. I was so impressed by this! Wow, this is worth investing in and having in your home. I know I will keep mine handy for future projects and for clients. My painter told me that he loved the quality of the paint. It is nice and thick and absorbs quickly. It does not splatter and splash and make a mess. He said if it were a cheaper quality paint, he would have needed to put more coats on, but since it is thick, he only needed two coats.
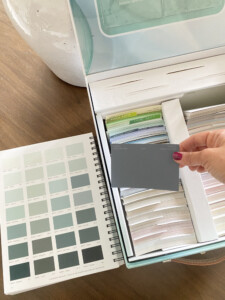
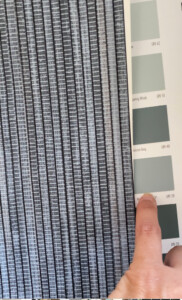
Landing on the color, Harrow’s gate, was no easy feat. I decided to try to pull a color from my wallpaper swatch. And since I was pressed for time, I did not even bother getting actual paint samples. I used the little color cards that came in the swatch box and taped them up on my basement walls. I went back and forth from dark blue, to blue-gray, to blue-green, to light blue, to grayish blue…you get the picture. I knew that really any color would look amazing and it was just a matter of choosing one.
Once I switched my wallpaper to the grasscloth, you can read about that here , picking the paint color became easier and so I narrowed it down to three and from there, I picked “Harrow’s gate”LRV 28- a medium blue, with some hints of greenish gray.
As soon as the paint went up on the 6 doors I had planned on painting, I knew I made the right decision. The doors really started to pop against the white shiplap. I had decided to paint the 6 closet doors because that wall really needed some contrast. I think it turned out amazing.
I thought it would be super fun to paint just one part of the ceiling. I decided to paint the ceiling above the round table, in the board gaming area of the playroom. However, I did not want to reveal this part of the basement just yet, you will have to stay tuned for a few more weeks.
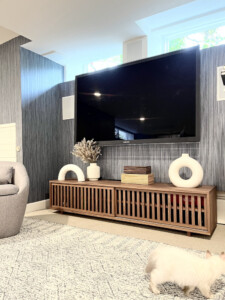
There was lots of progress this week on my One Room Challenge. Another item that got delivered was the media cabinet from Castlery. Castlery has so many furniture options and I knew that the Luka media cabinet would work perfectly for the kids gaming area. It cleared the mess, the cords, and everything is now tidied up in one space! Take a look!
What I love most about this particular media cabinet is the sliding slatted doors. They are perfect for little fingers, and because the doors are slatted, the remotes can sensor right through them. Also, I love the low, modern profile. Plus, the walnut color is a bonus! In addition, the cabinet slid right out of the box, without any assembly, now that is my kind of furniture!
Make sure to come back next week when I talk about my rug selections. But, please head on over to these other talented designers blogs to see what they are up to for week 2 of the One Room Challenge.
As you know I am an avid Serena & Lily fan. Going to the Hamptons this past August and visiting the Serena & Lily East Hampton store only fueled my passion for this coastal, high-end shop even more. Serena & Lily has launched a new tool that helps you view items that can be delivered in under 4 weeks. They have options for items arriving in 1-2 weeks, as well as eligibility for 2 day shipping!
**This post is sponsored by Serena & Lily and all opinions and words are my own.
With the huge backorder issue that has been so prevalent in the last year and a half, this availability feature is so helpful. So much frustration has been born with this backorder log that has been happening in almost every home design store, that this is a welcome addition to my shopping experience. I have had a multitude of clients call me almost crying after finding out that their items that they ordered 6 months ago will take another 3-6 months.
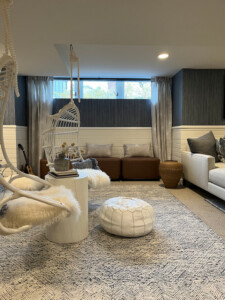
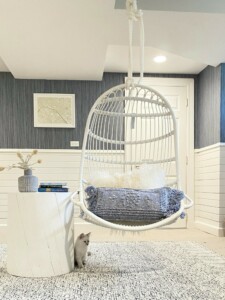
Here is an example of a space that I knew I needed to complete in a timely matter. You see, I have been chosen to be a featured designer for the One Room Challenge from Better Homes and Gardens. I have designed a coastal inspired, modern playroom for my kids. I really wanted to add the outdoor hanging chairs to the design, but wasn’t sure if I would receive them in time before the reveal of the One Room Challenge. Thankfully, they were available within 4 weeks, and sure enough I received them already. In addition, I also ordered Bayville side tables to help with my coastal inspired playroom and they came within 2 weeks. If you take a look now, you will see that they are readily available within one week! Also, the Montecito pillows completed the look and these are available within 10 days!
These 3 items transformed an otherwise boring space into my kids favorite reading nook in the home. And I am so glad I was able to provide this to them in a timely manner and not a year from now.
This availability feature has really made my shopping experience less anxiety ridden and I love that I know exactly when the item will be at my doorstep. And Serena & Lily stayed true to their promise and my items were in fact delivered before the date on the website. Sometimes you do not have the luxury of waiting 8 months for an item to arrive and this is when I turn to the Serena & Lily website and search for my items by availability! My 3 items above are just a few of the hundreds of items that you can receive in under 4 weeks from Serena & Lily and that makes my heart sing as a designer with clients who need their items fast.
Serena & Lily has proven to me time and time again that they are one of my favorite shops and this availability feature makes them top of my list and I have referred so many clients to their website so that they do not have to wait 8 months to receive something they really needed before barbeque season or the holidays, that are coming up! Not only is their quality absolute top notch, now Serena & Lily has given me the luxury of not having to wait and in this day and age, that is huge!
I know this will inspire you to visit the Serena & Lily website or one of their stores for all your home decor needs. Check out my other posts about Serena & Lily here and here. And you can also search for them by typing “Serena & Lily” in the search button.
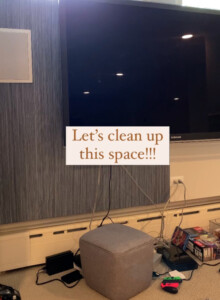
It is week 2 of the One Room Challenge, and things are moving underway in our basement playspace. I am finally done cleaning it out and I already feel better. It is always easier to start with a blank canvas. In Week 1, I briefly described the space I will be working with and this week I would like to mention all of the brands that I will be working with, and I am so excited to finally reveal my moodboard!
Every week I will be highlighting a brand or two and talking a bit about their products.
The moment I knew I was doing the ORC, I knew I had to introduce some wallpaper into the design. I knew it would give the space, the pop I have been craving. And I think starting with the wallpaper will help dictate the design for the rest of the space.
Tempaper Wallpaper
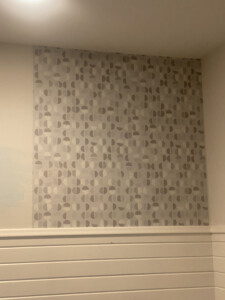
In honor of International Wallpaper Week, I thought it would only make sense if I introduced you to the wallpaper I will be using! Would you believe me if I told you that I had maybe 6 iterations of this moodboard. Yes, it takes time to land on exactly what you envision for the space. In fact, this was the second wallpaper that I actually stuck on the wall. I ordered six samples from the brand Tempaper. Tempaper specializes in peel n’ stick wallpaper for any space. Their wallpaper rolls are sold in single and double rolls which works great depending on the size of your space. I went ahead and decided on the coffee beans wallpaper. Tempaper offers wallpaper in grasscloth, burlap, textured, repurposed wood, faux wood, damsel, and shiplap styles. There are virtually hundreds upon hundreds of styles to choose from. I narrowed my selection down to 6. Even though I have textured walls, I went ahead and decided to go for it. Tempaper’s website suggests that if you have textured walls to go with a darker wallpaper. Tempaper was so wonderful and they sent me the rolls I needed. I was adamant that I wanted to stick with neutrals and stay true to my light, bright, airy style. And since this was a basement, I did not want it to feel “dark”. But, I was wrong thinking that a darker wallpaper would make my basement feel “dark”. More on this later, when I reveal the wallpaper I ‘actually’ chose.
The samples were shipped to me so promptly and that really gave me a huge headstart on figuring out the rest of the space. Here are the wallpaper samples from Tempaper on the basement wall.
I loved all of them and I knew that each one would take the basement playroom design in a different direction. I ordered the coffee bean wallpaper and started to stick it to this first wall here in the basement.
I immediately knew that this just is not the one. It just didn’t do anything for the space. I felt like it just fell flat, maybe because the carpet is so beige and it kind of all blended in. I thought this one would be beautiful in a nursery or modern office space. So, I went back to the drawing board and grabbed my samples again. This time, I wanted a pop against that shiplap, but I wanted a very clean look. So, I remembered that Tempaper has amazing grasscloth looking wallpapers and I knew this would give me the modern feel I was after. I even came across this particular one on the Crate & Barrel website and it looked super chic and rich to me! They sent me the Chambray grasscloth. As soon as it went up I got goosebumps! Hurray, victory!
Look at the difference. I needed this pop of color down here. This helped push me out of my comfort zone. Tempaper has so many options, I would even go more bold next time around and do a really fun pattern. This Chambray has won my heart though!
It really made that shiplap pop. I knew I did not want to repaint that shiplap because that would be a major undertaking. But, the wallpaper really made it feel crisp and more inviting! And Tempaper wallpaper is so simple because it is just a peel n’ stick…no fancy glue or adhesives needed, and no mess. What’s more, you can peel it off in a few years if you want to change the space again without major damage to your walls!
I continued the wallpaper around the perimeter of the playspace and around the tv area. However, I did not want to reveal too much right now, so you will have to wait to see more! This definitely taught me to be patient and your vision will eventually come to you. I am so glad I listened to my gut and switched out the wallpaper. As much as I loved the first one, it wasn’t right for my space and that is okay because Tempaper has hundreds upon hundreds of other choices. I cannot wait to show you more of this wallpaper. It is just so luxurious looking and inviting!
Make sure to come back next week when I talk about my rug selections. But, please head on over to these other talented designers blogs to see what they are up to for week 2 of the One Room Challenge.
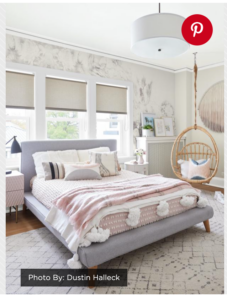
I have had a few pinch me moments in 2021, and the next one that has me wondering how I got here is being chosen to be a featured designer for the One Room Challenge. I had just finished seeing our actual 10 page spread in HGTV Magazine for the September 2021 issue, when I got the email from Linda Weinstein, the founder of the One Room Challenge. I could hardly believe it, but I had worked so hard to get to this point, so truthfully, I know I deserved it. Back in 2018, I reluctantly joined the One Room Challenge as a guest participant and I was so surprised with the outcome and how much attention that room received. I made over my daughter’s bedroom in our last house and she loved it so much, I decided to redo it here in this home using the exact same wallpaper and furnishings. So, without further ado, my One Room Challenge, will be our basement playroom.
WHAT IS THE ORC?
First off, what exactly is the One Room Challenge? Twice a year, 20 designer/bloggers are selected to participate in a design event that spans 8 weeks. We have 8 weeks to complete a space to it’s utmost potential and we have amazing brands sponsoring us. I am so honored to be one of these 20 featured designers this Fall. Thank you to Linda for reaching out to me and working so hard to produce this design event. Better Homes & Gardens is the media sponsor for this event.
MY INTRO
In case this is your first visit to my website, my name is Reem and I am a local ‘decorator’. When we built our last house, neighbors would come visit me and beg me to come design their homes. So, I finally started up a small business after leaving my career of teaching. I always knew I had a knack for creative design in different spaces and so I started an Instagram page 6 years ago, and here I am. I have helped clients in surrounding neighborhoods redesign and decorate single rooms to entire floors. Since then, we sold our last home that we built and we stumbled upon this 100 year old gem and I have been busy updating it.
THE ORC SPACE
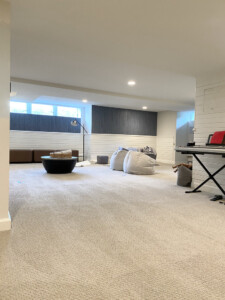
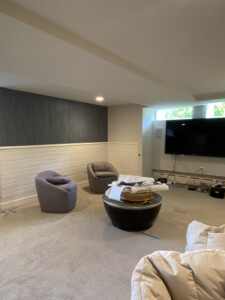
I have many beautiful, magazine worthy rooms in our vintage home, but the one room I could hardly stand to walk into is my kid’s basement playroom space. So, that brings us to the area I will be redoing. I almost decided against this space because I knew it was not photograph friendly. With hardly any natural light and lower ceilings, I knew this space would be a challenge. But, at the same time I wanted to inspire others that have challenging spaces to make the most of their rooms. Also, I wanted to do this for my kids, they deserve it, and they spend more than half their life down in that space, lol.
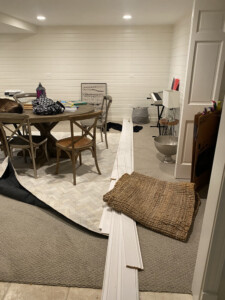
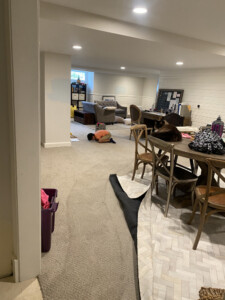
These before photos are cringe worthy. They make me gasp and I am a bit embarrassed. But, here is the before, just so you can understand the depth of my design disappointment in this space. It, unfortunately, has been reduced to a furniture graveyard for old, rejected, mismatched, never loved articles of decor and furniture. Let’s just all agree to just say it is a very “lived in” space. As you can see, my kids still play in the space and it doesn’t even phase them. However, my 11 year-old one day told me, “mama, can you make this playroom really cool like the rest of the house”? And so, my mom-guilt kicked into high gear.
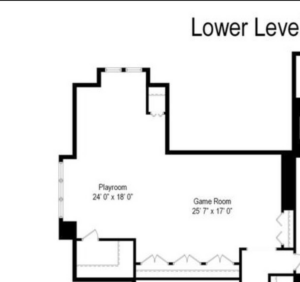
Before we get into the actual design of the space, let’s talk about the layout.
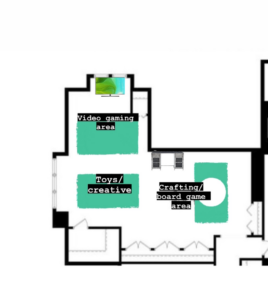
As you can see we have a pretty big space. I love the shiplap that runs along the entire wall. But, I feel like it is lost in the space and it doesn’t make an impact, the way it can. The paint color above the shiplap is dingy and almost looks dirty. That color just does not work in the space. Also, I knew I needed to divide the space up somehow. The video gaming area will be in the “playroom”space above and the the “game room” area will have a crafting area and desk for my creative illustrators. The only furniture I will be keeping is the Restoration Hardware desk and round table. Everything else is going. Everything…Ok, maybe I will be keeping one organizer for toys, just one. But, before we do anything, there is a whole lot of purging to be done, so let’s get to it.
Stay tuned for the moodboard reveal in Week 2 and the direction of design that I will be heading in. I will also be sharing all of the wonderful brands that I will be working with and exactly what I will be doing to complete this space. Just a warning, this space will be very different from the rest of my home, but I look forward to going outside my comfort zone a bit, and when I say that, I mean, doing something that I normally don’t do, which is using color. Now, head on over and check all the featured designer’s posts.
HGTV has given me the honor of featuring my home in their September issue and it is on newstands right now! On May 5 and 6, they the HGTV magazine crew visited us and took countless photos of our home. It was the absolute best, “pinch me” moment of my small career yet! The online print feature has dropped today, and here it is. Below, I included the photos that were printed in the magazine. Thank you, HGTV magazine for this amazing experience. Make sure to head on over to the link below to read the entire article and for a full list of sources!!!
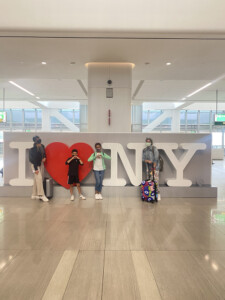
It’s late summer and we have no idea where to travel. We knew we want to get away, but we have a pool at home and going from a warm climate to another warm climate, just didn’t make sense, so we knew we didn’t want a swimming/resort type of vacation. We wanted an adventure. For the longest time my husband and I talked about visiting New York City, so we figured, what the heck, let’s do it. Our 4 kids are old enough (20, 15, 11, 9) to walk quite a bit without complaining, so we figured they’d be ready. Since my husband is a Marriott rewards member, we decided to stay at the Marriott Marquis Times Square (great hotel, but I wouldn’t stay in Times Square again). More on this later. My husband and I knew that after 4 days in NYC, the younger kids would probably be pooped, so we decided to book 3 nights in Long Island just outside the Hamptons.
Right off the bat, as soon as we walked the streets NYC felt different than Chicago. Chicago feels very segregated to me, and NYC felt like a melting pot. Everywhere we went I would look up homes on Zillow and find that there were multi-million dollar condos right next to $600k apts. On the streets you see people from so many different ethnic backgrounds and I found this to be extremely heart warming. It did not feel unsafe at all. The police presence in NYC is quite evident. And if you are a New Yorker, you might think I am misinfomed, but this is how I felt as an visitor. It truly is a melting-pot in every sense. Also, these are my opinions about the places we visited. We only had four days in NYC, so we tried to make the most of it. Next time, we would like to do more, and definitely visit Broadway, which was closed due to Covid.
Itinerary
First day:
-Arrival at hotel.
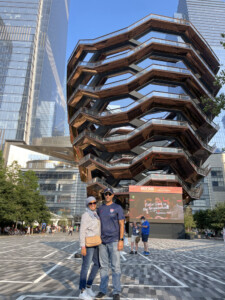
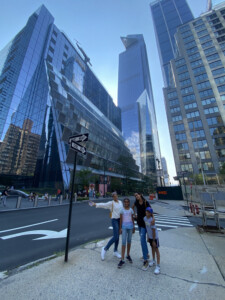
Hudson Yards
We unpacked and started our walking journey to Hudson Yards. What seemed like a simple task turned into a whole lot of walking. Hudson Yards has a great mall. It has lots of upper end shops and a great food scene. It also houses Warner Media (CNN News), which my husband was excited to see.
The Vessel
Just outside Hudson Yards is the Vessel. This is a huge structure made of hundreds of metal stairs, which we reluctantly climbed to the very top. If you have a weak stomach and look down, you can get queasy, which happened to myself and my 15 yr old. It was a cool experience. I would say this is a one and done type of thing. Once you climb it once, you probably won’t want to again. I recently found out that this structure might be permanently closed. You can find out why if you google it.
The Edge
Just outside Hudson Yards, is the Edge. This is a new building which has an outdoor platform perched at least 80 stories up with spectacular views. Since we knew we would visit the Top of the Rock, we decided to skip this. But, we loved seeing this new skyscraper from outside. It is breathtaking!
Times Square at Night (Not recommended)
By then, we were exhausted from all the walking on a few hrs of sleep and decided to head back to the hotel and order in. We ordered some awesome New York pizza and watched the Olympics and collapsed. I wish there were more quick eats in Times Square, but we could not find much to eat around the hotel. On our way to the hotel, we inevitably had to walk through Times Square at night, which was extremely crowded. Call me traditional, but some of the characters in Times Square were not of the family friendly type. I had to cover my younger kids eyes and we swiftly took them up to the hotel. LOL. My 15 yr old said that it wreaked of weed and she was correct. I am sure some would argue that exposing your kids to some of these things can be good for them, but I was not that excited about that. So, Times Square is just not my cup of tea. Also, if you decide to go, go during the day. It is less crowded and the fake Mickeys won’t chase you down. We wanted to just walk around and enjoy the lights, but there were too many people trying to push their sales in that area. It was actually kind of cool seeing where Good Morning America is taped, but that’s about it for me. We took the kids to the M&Ms store and they enjoyed that as well.
I’d love to go back to this area once Broadway is opened up. I would spend only 3 nights in NYC and hit up some Broadway shows. This is the only reason I would ever go back to Times Square.
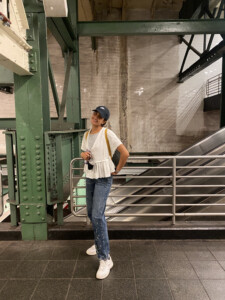
The Subway
The next day we decided to be smarter and use the subway. We are a family of 6, so finding an Uber that would take us proved to be challenging. Subway tickets are $2.75 per person, so my husband downloaded the App and would pay as we enter. It ended up being roughly $9 per day per person. If you stay a week in NYC and use the subway everyday it would make sense to get the 7 day ride pass for $35. Google maps did a great job navigating for us. At first, we were afraid to take the Subway. But, we’ve been in Paris and you need to take the Subway there to get around as well. It felt very safe and I feel like taking the kids on the subway showed them how people live. I was so happy to take them outside our comfortable bubble and teach them skills that they never would have otherwise. I love giving my kids experiences that are not our norm. I made my older kids hold the maps in their hands and had them navigate us.
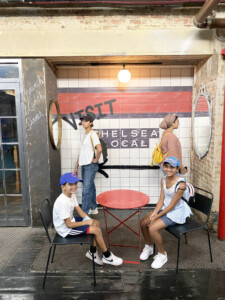
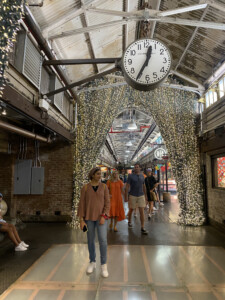
Chelsea Market- A must visit
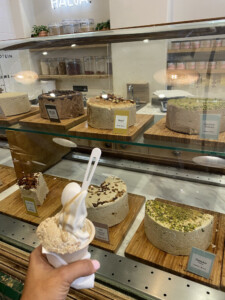
We visited Chelsea Market which is an indoor mostly food and quick dine market. We loved Chelsea Market so much we visited the next day as well. It is also a great spot for a clean restroom break. It is so cool. It is an old building transformed into the coolest indoor market ever. This is another thing I love about NY. They have taken such great care in preserving a lot of the old buildings and turning them into something fascinating.
The Friends Building
After we grabbed lunch at Chelsea yards we hopped back on the Subway and searched for the “Friends Building”. We found it! It was so cool seeing the actual building the show was based on. My older two were so excited to see this! This was super easy to find, you just navigate to the address which is all over the internet.
Washington Square
We continued our self-inflicted walking tour and headed to Washington Park. My older two wanted to go because NYU is right there and we walked the campus a bit and took a long break on the benches and people watched. The Arch in the park is so similar to the Arch de Triomphe in Paris, so that was cool to see since we’ve been to Paris.
Btw, NYC has bags and bags of garbage bags. I’ve never seen this in Chicago. We’ve been to Egypt several times and that is common there as well. So, I get it…it’s a big city.
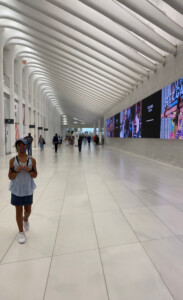
Ground Zero
You exit the subway stop at Ground Zero and it is so cool. It seemed like a giant train station (maybe an Amtrack station). It is beautiful. Then you take the escalator up to Ground Zero. We made it just in time before it closed at 5:00, so we missed the museum, but the Memorial is just mind boggling. Two giant empty holes where the buildings once stood. NYC did such an amazing job with this memorial where they have the names of the deceased engraved on the platforms. It made me cry and gave me so many goosebumps. Ughh.
We stopped for dinner in a nearby restaurant and headed to the hotel.
Day 3
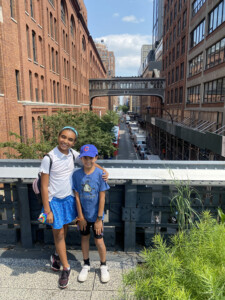
Highline
The Highline is an old train track that has been transformed into a raised garden walkway. It is beautiful, clean and I saw a celebrity (a Peloton instructor) walking it. This is also a must do when visiting NYC. Another perk of the Highline is it is free!
We did so much on day 2, that we decided to do less on Day 3. So, we headed back to Chelsea Market again to eat since we loved it so much and it is right next to the Highline. We loved this neighborhood and said to ourselves that we might even stay there the next time we visit.
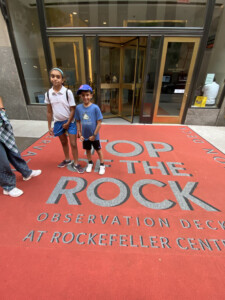
Top of the Rock
We bought tickets for Top of the Rock which is located in Rockefeller Center early in the day and booked a 7:30 time, before sunset. We headed to Rockefeller Center right after dinner (lots of great restaurants in this area). We wanted to see the city from above at daytime and at nights when the lights turn on. It was magical. Seeing the city light up had to be the highlight of our trip.
We grabbed dinner afterwards and headed to the hotel. We used Yelp a lot to find casual dinners and Open Table for a “fancier” dinner option. You cannot go hungry in NY and it was super easy finding a slice of pizza or coffee. Once again, we swiftly walked through Times Square to get to the Marriott and we wish we had stayed elsewhere.
Yippeee…check out time. Before we left to Long Island, we made two more final stops in NYC. On the fourth day, my awesome husband commuted to LaGuardia to pick up a rental car for us so we can drive to Long Island where we spent 3 days of bliss. We are so happy we did this. It was a last minute decision, but so worth it! We stayed just outside South Hampton for 3 nights. Needless to say I fell in love with the shops, boutiques, homes, and most of all the clean beaches. But, first, two more important stops.
Central Park
We bought bagels and walked to Central Park and ate them there. Central Park has a great surrounding neighborhood with gorgeous brownstones. I would definitely add this to your itinerary. We didn’t have much time so we didnt rent bikes and bike around the entire park. My kids were excited to see the “Jessie” building. They watch this show on Disney Plus all the time, so it was cute seeing them this excited.
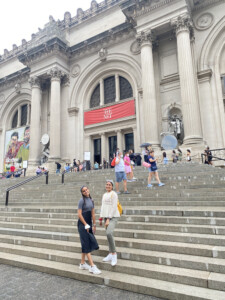
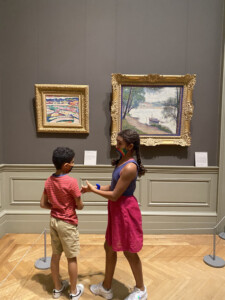
The MET
Before leaving NYC, we knew we should spend half the day at the MET. Since we had a car, we parked in the parking garage and that avoided the long line to get into the Metropolitan Museum. This is a great museum and if you have been to the Louvre in Paris, I would say it is a mini version of it. VanGoh, Monet, Egyptian and Roman treasures, and so much more to see here. We really enjoyed it. There is something for everyone in this museum. Plus, we had to see where the MET gala takes place every year.
My kids loved crossing all the bridges leading to Long Island, especially the Brooklyn Bridge. We wanted to walk the Brooklyn Bridge, but we ran out of time.
The drive to Long Island from Manhattan took about an hour and a half. We stayed just outside South Hampton and drove to the Hamptons everyday and it was a very easy drive. We wanted to see this entire area, so we drove a lot and hit up a bunch of towns.
Montauk
The next day we drove to the Montauk Lighthouse the next day and it was magical. My kids (old and young) started a beach pebble collection. It was so nice to see them unplug from their phones and enjoy the simpler things in life. Montauk has a great little town with shops and eateries. We wish we had stayed there (maybe next time). It is a cute little beachtown with very extravagant homes. Hamptons Coffee Company is a must stop too!
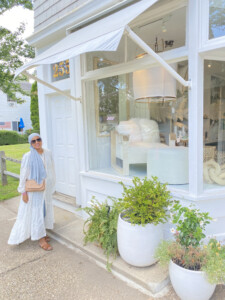
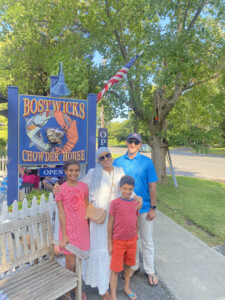
South Hampton
We also visited this town to shop and eat lunch. We grabbed lunch twice at Broderick’s Chowder house. We were so happy to find that they had clam chowder without bacon and it was delish. I ordered Lobster tacos and they had so much good food on the menu. We loved the beach there and visited it all 3 days. We did not swim because the water was freezing. It was just nice to walk along the beach and gather rocks and drool over the homes. I highly recommend visiting the beaches in the Hamptons.
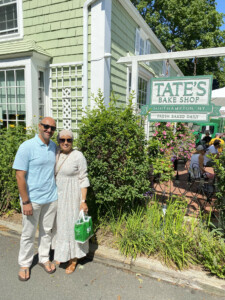
The Tates Bake shop is a must. We grabbed coffee and cookies (of course) from here.
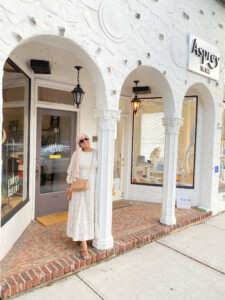
Amagansett
Amagansett was also a great town with so many cute boutiques and shops. All of these towns are right along the main stretch of hwy and you can knock them all out in one or two days if you are just going to shop.
East Hampton
East Hampton had a cute little town where we stopped for some shopping and ice-cream.
We were so happy that we split our vacation into two sections…NYC and Long Island. It was such a treat to end in the Hamptons. But, wait! We had to drive back to NYC to catch our later 6pm flight on the last day. So, after we checked out of Long Island we drove back to NYC for one more very important stop.
Lady Liberty
There are so many ways to view Lady Liberty, but you cannot see it from Manhattan. We took a quick tour of just Ellis Island (without getting off the boat). We did not have time for the more lengthy tour, so we decided to only view it from the boat. We found the tickets on TripAdvisor. We thought it was just perfect. On the next trip to NYC, I would take the ferry to Governors Island and view it from there because I have heard that Governors Island is a fun spot. Alas, this was the perfect way to end our first trip to NYC!
This was the most perfect ending to our trip. Next time- Broadway! I hope you enjoyed this article!
Hey, you!
Don’t miss out.
Subscribe to my weekly newsletter to keep up-to-date on the latest.
Thanks for stopping by!
See something you like? Don't forget to follow along on LKTI!
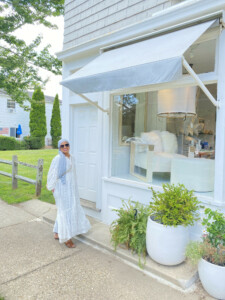
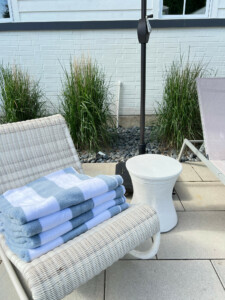
These are the moments…But first, my fave beach towels, and everything @serenaandlily and everything is 20% off now!! Did you know this dress I’m wearing is also from @serenaandlily ? AD …….this past weekend, my 5th grader finally made this shot that he’s been practicing and his confidence just soared! This is likely going to be a core memory for him and something his momma will always remember. The excitement was the perfect ending to this video and to the day. Now I just need to get some gorgeous pool loungers to complete the look during this sale. What say you? Head to my @shop.ltk page to shop (link in bio). 💫💫💫Head to stories to see what famous Netflix star we met yesterday!!!
.
I’m walking around my house sharing my favorite @serenaandlily items ever. Everything on their site is on sale.
.
.
.
#homedecor home decor #homedesign home design #interiors #interiors #interiordesign interiordesign #exteriordesign exterior design #homefinds #modernhomes modern homes #organicmodern #japandi #japandistyle #modern home #homerenovation home renovation
Please don’t judge my technique 😅 I’ve tried so many Amazon mugs and this is by far my favorite. I know a lot of you have it. How many of you already bought this cute lady? Linking to stories and it’s in my @amazon shop (link in bio)! I’m at my daughter’s swim meet and then heading to my son’s 5th grade party, we have gorgeous weather today ☀️ ☀️☀️
.
.
.
.
#amazonhome #amazonfinds #amazon #homedesign #homedecor #kitchen #kitchendesign #kitchendesignideas
Some of you asked me if the @by_crea Sella dining chairs would work a dining room…. so, I did a little experiment this morning, I moved my four Sella dining chairs to the dining room and O.MG. they look fab here. So, if you’ve been considering these for your dining room, they would definitely look amazing! I think I’m getting closer to finding chairs to my dining room because I now know the style! Head to my link in profile to purchase via my link using code REEM33OS for free worldwide shipping for these high-quality, chic, Swedish chairs or anything on their site. I will also add to my stories today and I have a highlight reel saved!
.
.
.
.
#weekendvibes #foryou #fyp #instareels
#diningroom dining room #diningroomdesign dining room design #modernfurniture #modern furniture #modernhome modern home
My husband takes pride in his work😅😅 This 200 gallon deck box has finally made things so much easier for him. Now he loves stowing things not in use in this box, rather than running to the garage to stow it. Can you believe how large this is? Love that it comes on wheels too! Check out @yitahome for all their outdoor goods. I’ll be linking this to stories a coupon code and of course, it’s in my @amazonhome shop (link in bio).
.
.
.
#amazon #amazonhome #amazonhomefinds #yitahome
#yitahome #amazonoutdoorfurniture #amazonmusthaves #founditonamazon #patiodecor #outdoorfurnitureideas #storagebox #outdoorspace #myhomesense #myhomes #yitahome #patiofurniture #patiofurniture
I picked these from my yard 2 years ago and they are still going strong! The only downfall, they are messy, so have your cordless vacuum handy! And I’m sharing my fave one (under $40!) in stories today! also, sharing this vase, plus many other faves in my @ltk.home page-link in profile!
.
.
.
.
.
#hometips #homehack #newfloors #europeanwood #homedecor #homedesign #modernorganic #organicmodern #organichome #homestyling #reels #reelsinstagram #livingroominspiration #homeinspiration #interiorstyking #interiordecor #homeinterior #homedecor #reelitfeelit #ltkhome #neutraldecor #modernfurniture #jennikaynewomen #neutraldecor
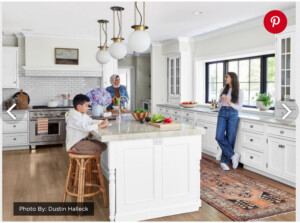
I get asked this question daily! Let me tell you why I LOVE quartzite and I want you to tell me which counters you have and if you love them! Head to stories for more on this today!
This is Taj Mahal btw….
1. It’s a natural stone, so it has natural veining and variation similar to marble in appearance
2. It’s more durable than marble. It doesn’t etch when exposed to acidic liquids like marble does
3. It’s the hardest stone (harder than granite)not soft like marble, so it’s difficult to damage
4. It’s extremely scratch and heat resistant
.
.
.
#marbledesign #kitchencounters #kitchendesign #kitchendecor #kitcheninspiration #kitchenremodel #kitchendecor #quartzite #quartzitecountertops #marblecountertops #marblecounters
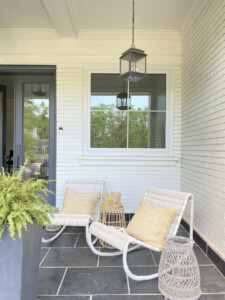
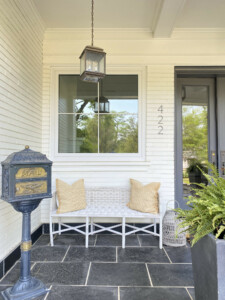
About one year ago, we replaced our front porch. It was such a daunting decision for me to make. I’m the end, I stuck with something classic and timeless…bluestone in a diamond pattern and we love how it turned out. We did so much more, like adding crushed bluestone to our beds and it’s so much easier to deal with than mulch. I’ll show you in stories today. We still have some mulch and I’d love to transition over to all pebbles one day soon.
.
.
.
.
#newporch #bluestone #bluestonepatio #frontporch #exteriordesign #exteriors #exterior #exteriorsofinstagram


